
How can we help?
How to Trade/Swap Shifts in the Shift Swapping Module
Overview
The Shift Swapping Module allows employees to trade shifts with their coworkers to manage their schedules more flexibly. This guide walks you through the step-by-step process of requesting, approving, and finalizing a shift swap.
Prerequisites
Before using the Shift Swapping Module, ensure the following:
- Predefined Shift Templates: All shifts must be created and assigned by the manager within the scheduling tool in advance.
- Employee Access: Employees must have access to the web interface or portal to view their schedules and initiate shift swap requests.
Step-by-Step Guide: How to Request a Shift Swap
Step 1: Employee (John) Requests a Shift Trade
- Log into the NextGen Account:
Use your credentials to log into the system. - Access Your Schedule:
Go to “My Schedule” : https://app.webapph.com/app17/scheduler/calendar - Follow this URL to initiate a Swap Request: https://app2.webapph.com/Schedule
Click “Request Trade/Swap.”

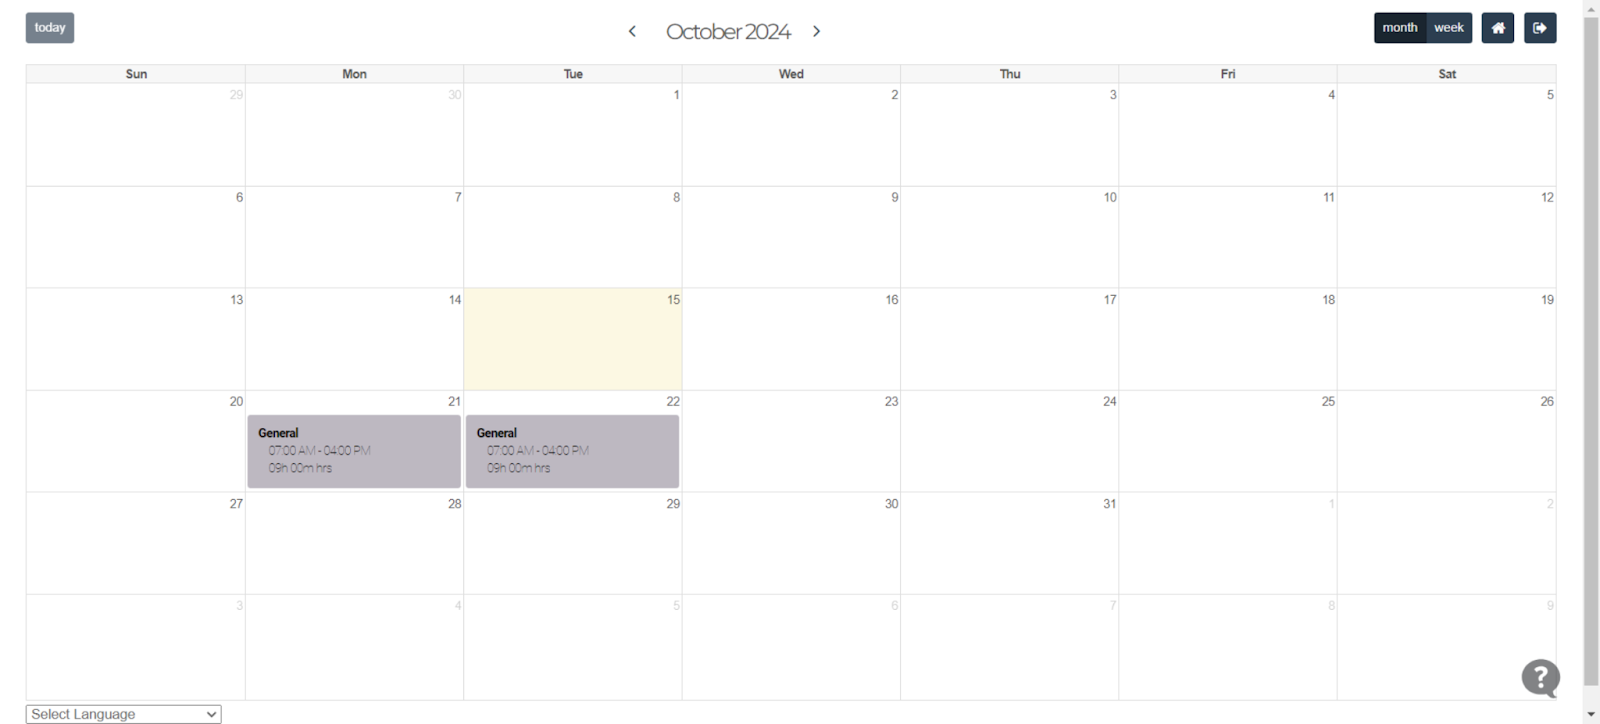
Select the Shift to Swap:
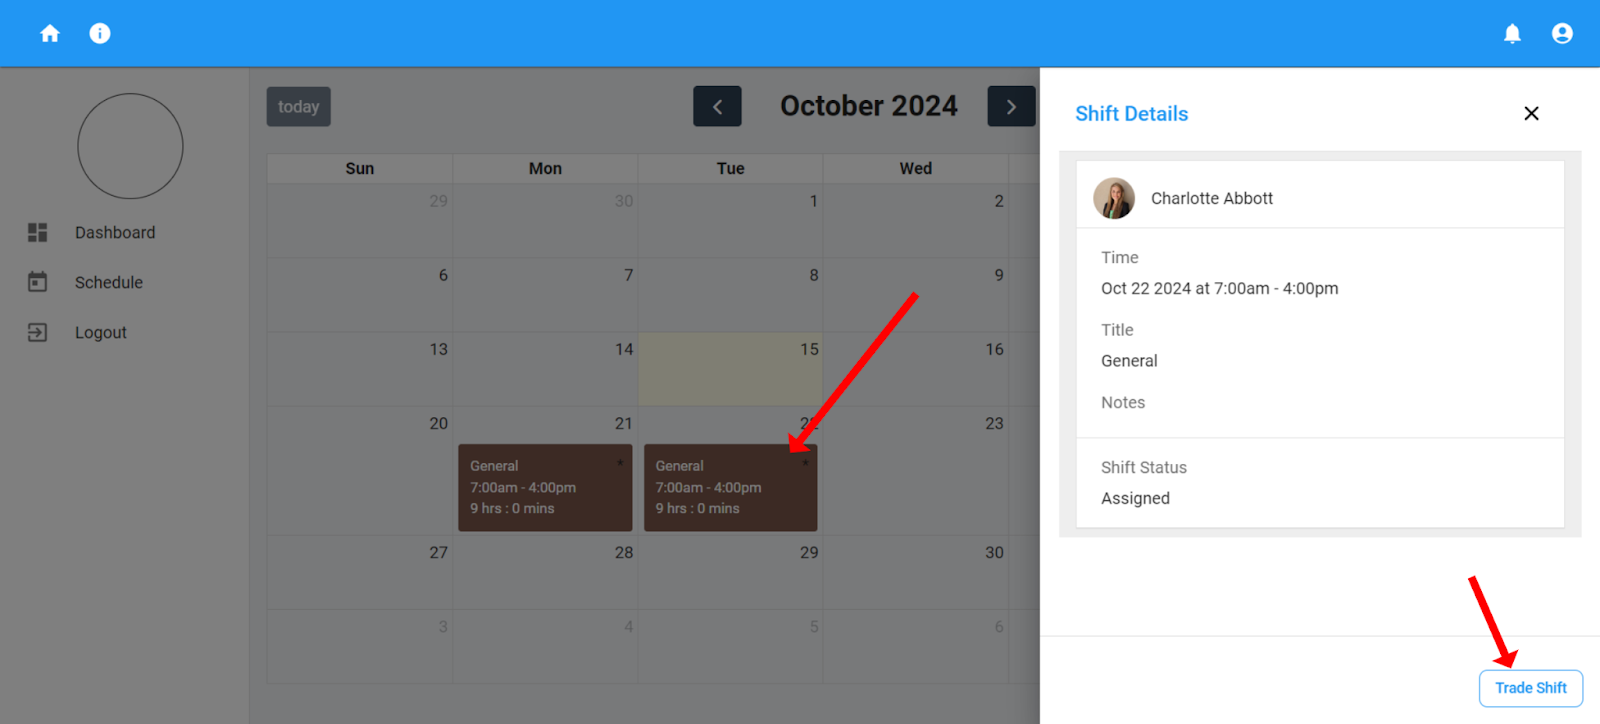
- Step 1: Click on the shift you wish to swap from your schedule.
- Step 2: Click the “Trade Shift” button to initiate the swap request.
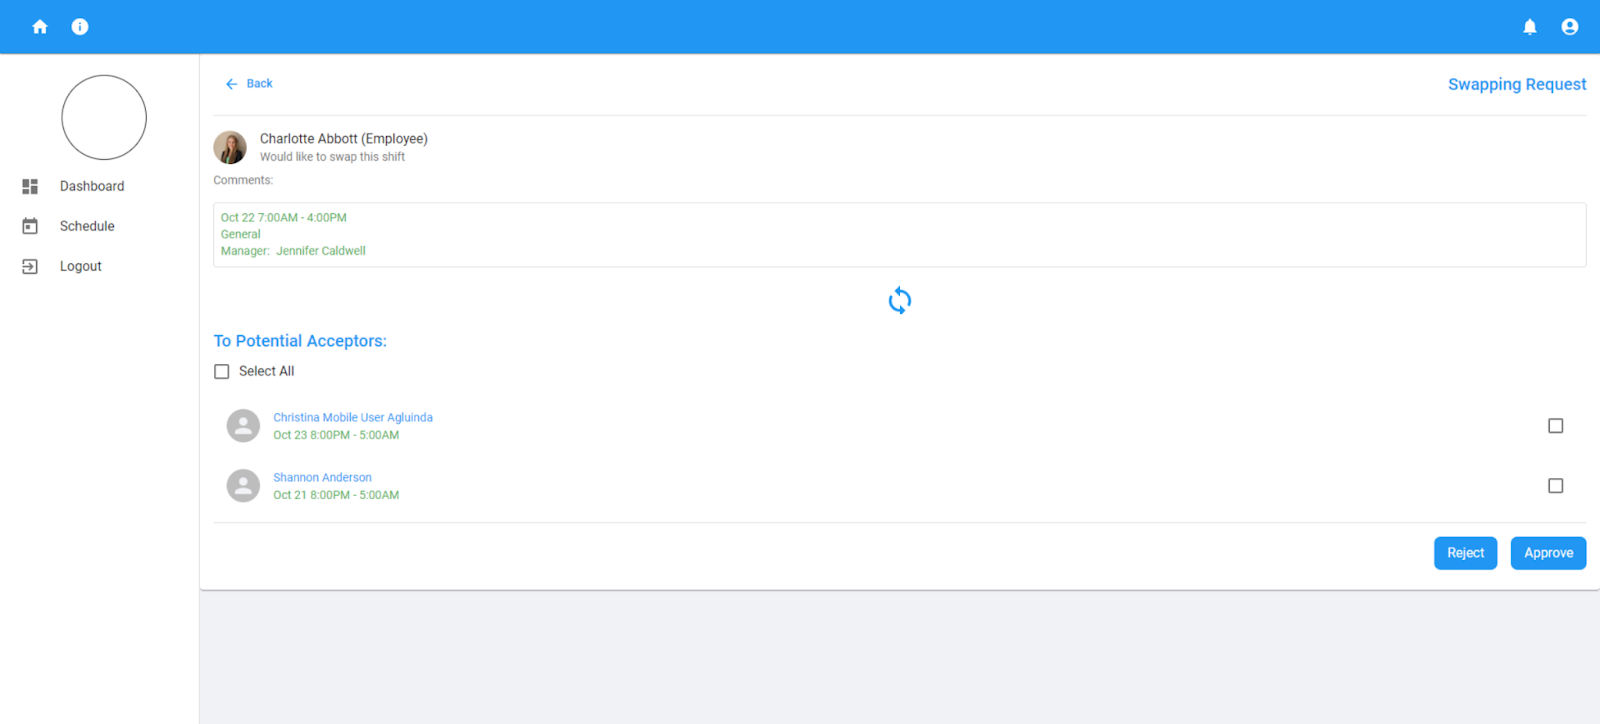
Step 3: Select the shifts you wish to trade with the recipient employees (coworkers with available shifts on eligible dates).

Step 2: The Manager Receives the Swap Request
- Manager Approval Process:
- The system sends a swap request notification to the manager for review.
Go to the Bell Icon:
- The system sends a swap request notification to the manager for review.
- Navigate to the bell icon in the top-right corner of the shift management system.
Find the Swap Request Notification:
- In the notifications list, look for the swap request submitted by the employee.
Click on the Notification:
- Open the swap request notification to review the details, including the shifts and selected employees.
Approve or Reject the Request:
- As the manager, you have two options:
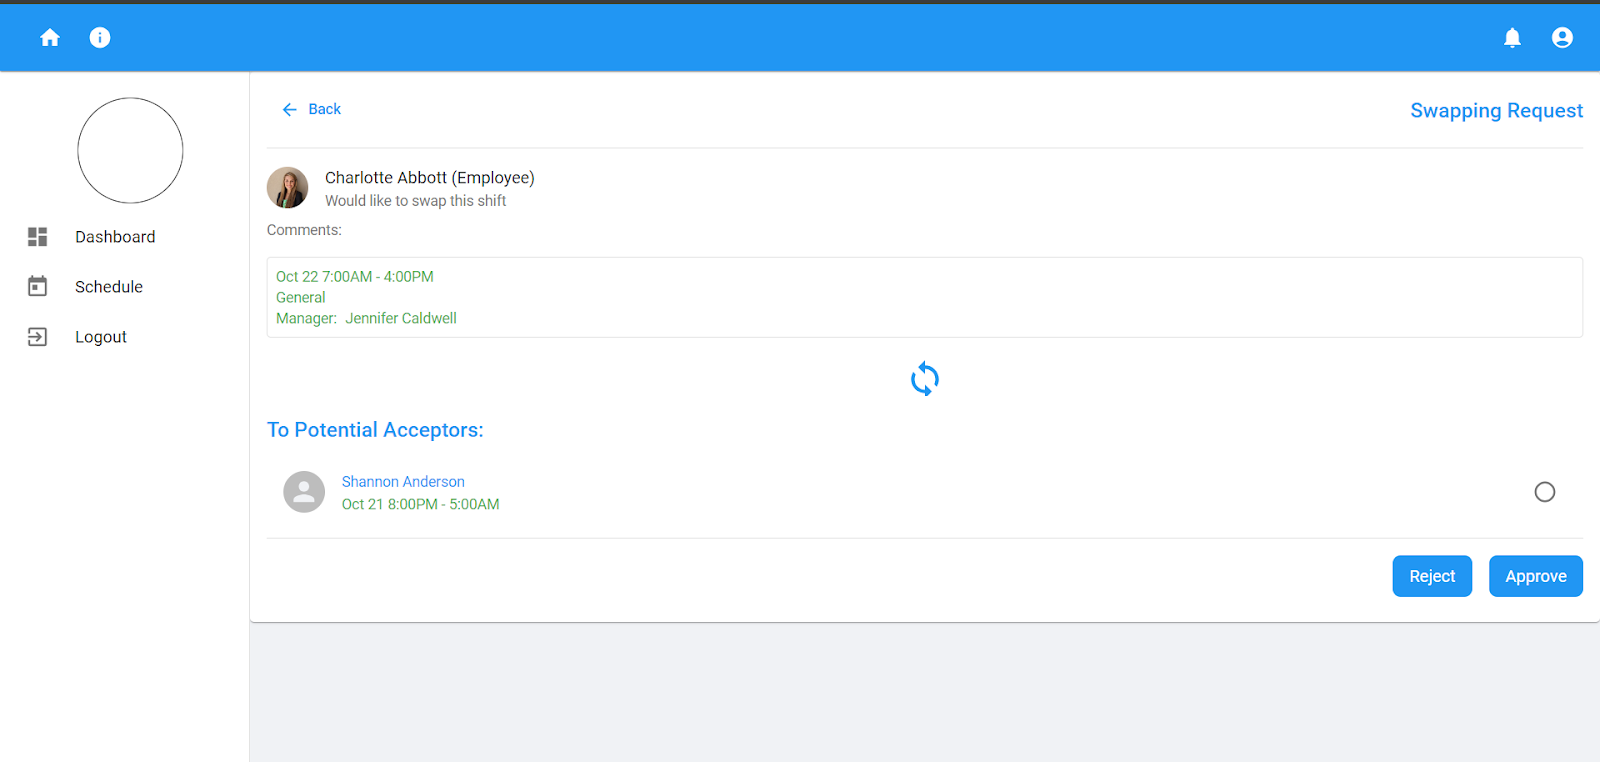
- Approve the Request: Confirm the swap with one of the selected employees chosen by the requestee.
- Reject the Request: Decline the swap, and the requesting employee will be notified.
- The manager can Approve or Reject the request.
- If the Manager Rejects the Request:
- The swap request will be declined, and John (the requesting employee) will be notified.
- In this case, the swap will not proceed, and John will need to work the original shift or submit a new swap request.
- If the manager approves the request:
- The swap request notification is forwarded to the selected employee (recipient employee) for confirmation.
Step 3: The Recipient Employee Receives the Swap Request
- Go to the Bell Icon:
- Navigate to the bell icon in the top-right corner of the shift management system.
- Find the Swap Request Notification:
- In the notifications list, look for the swap request sent by the requesting employee.
- Click on the Notification:
- Open the swap request notification to review the details, including the shift you are being asked to swap.
- Approve or Reject the Request:
- As the recipient employee, you have the following options:
- Approve the Request: Confirm the swap, and your shift will be exchanged with the requesting employee’s shift.
- Reject the Request: Decline the swap, and the original shifts will remain unchanged.
- Take No Action (Pending): If you do not respond, the request will stay in Pending status until you take action or it expires.
- As the recipient employee, you have the following options:
- .
Example Scenario: Multiple Swap Options
John, a sales associate, wants to swap his shift on October 20. He selects three coworkers with eligible shifts:
- Sarah: October 22
- Michael: October 21
- Emma: October 23
John submits the request, and the manager approves it. Notifications are sent to all three employees. If Sarah approves first, the swap is finalized, and the options for Michael and Emma are automatically canceled.
Handling Rejected Requests
- Manager Rejection:
- If the manager rejects the swap, the request is marked as rejected, and the original shifts remain unchanged.
- Recipient Employee Rejection:
- If the recipient employee rejects the request after manager approval, the swap will not proceed, and the requesting employee will be notified.
Few important things.
- Eligible Employees: Only those with assigned shifts on current or future dates will appear for swap selection.
- Approval Requirement: All swaps require manager approval before being sent to recipient employees.
- Notifications: Notifications for swap requests and status updates are available under the bell icon in the top-right corner.
- Finalization: A swap is only finalized when both the manager and recipient employee approve it.
Troubleshooting
- Unable to Find an Employee to Swap With?
- Ensure that the shift you’re trying to trade is on a current or future date, and that the employee you’re choosing has a scheduled shift.
- Swap Request Rejected?
- Contact your manager to understand the reason for rejection or submit another swap request.
- No Response from Recipient Employee?
- Follow up with the recipient employee to confirm if they received the notification.


