
How to Import/Export User Data
Overview
The Time Clock device supports USB-based import and export functionality, allowing administrators to manage user data efficiently. This includes downloading user data from the device to a USB drive or uploading data to the device from a USB drive.
Before You Begin
-
Make sure you have a USB drive that is properly formatted (preferably FAT32).
-
Insert the USB drive into the USB port of the Time Clock device before initiating the import/export process.
How to Export (Download) User Data from the Device
-
Press the “M” key on the initial screen to launch the Main Menu.
-
Use the ▼ key to scroll down and select USB Manager, then press OK.
-
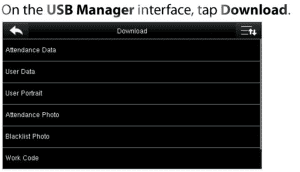
Select Download and press OK.
-
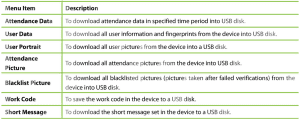
Use the ▼ key to choose the specific item to be downloaded (e.g., user data, attendance logs, templates).
- Press OK to confirm the export. The selected data will be saved to the USB drive.

How to Import (Upload) User Data to the Device
-
Ensure the USB drive with user data files is inserted into the device’s USB port.
-
Press the “M” key to open the Main Menu.
-
Use the ▼ key to navigate to USB Manager, then press OK.
-
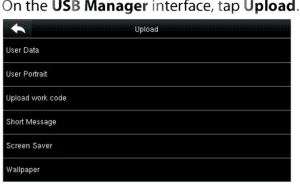
Select Upload and press OK.
-
Use the ▼ key to choose the item to be uploaded (e.g., user information, fingerprint templates).
-
Press OK to begin the upload. Wait for the process to complete before removing the USB drive.
-
Important Notes
-
Make sure the files are in the correct format supported by the device.
-
Always backup your user data before importing new data to avoid overwriting existing information.
-
Avoid disconnecting the USB drive while upload/download is in progress.
Need Help?
If you encounter any issues, contact NextGen Workforce Support.
📞 Support Link: NextGen Workforce Support


